Purpose
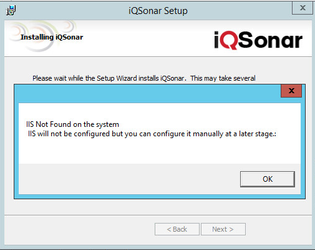
When installing iQSonar 2.14.x on Windows 2012 the install will complete but report that IIS was not found on the system and was not configured even when IIS is installed properly. This can be resolved by adding the iQSonar Web Application manually as detailed below or by downloading the attached script that will streamline the procedure.
Solution 1 - Script file to add the iQSonar Web Aplication:
Download the Win2012iis.rar file and follow the instructions in the readme.txt file - this will automate the steps detailed below via a batch file.
Solution 2 - Manually add the iQSonar Web Application:
Pre-requisites:
IQSonar installed.
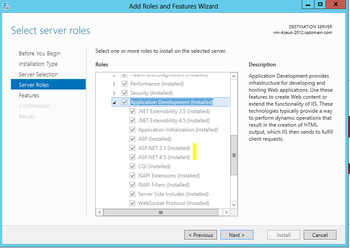
IIS Role installed and configured with features enabled per documentation. The following features must be enabled in IIS (from IQSonar Scan Prerequisites):
- ASP.NET
- .NET Extensibility
- ASP
- ASAPI Extensions
- ISAPI Filters
- Server-Side Includes
- Default Document
- directory Browsing
- HTTP Errors
- HTTP Redirection
- Static Content
- Request Filtering
- WindowsAuthentication
Tip – add the IIS Role and .NET runtime before running any Windows updates for easy install. For issues installing .NET see Installing DotNet 3 on Windows 8 /Server 2012
Step 1 - Create the iQSonar Application Pool
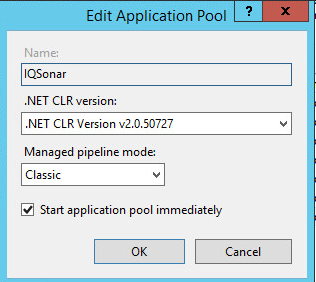
Add an iQSonar Pool with the following settings:
- Name = IQSonar
- Net CLR Version = v2.0.50727
- Managed Pipeline mode = Classic
- Check the: Start Pool Immediately and click OK
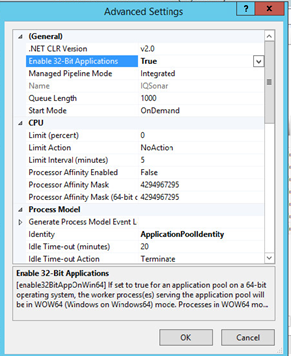
- Highlight the IQSonar Application pool and select Advance settings from the menu on the right and set Enable 32-bit-applications
to True.
Step 2 – Add the iQSonar Application to the Default Web Site
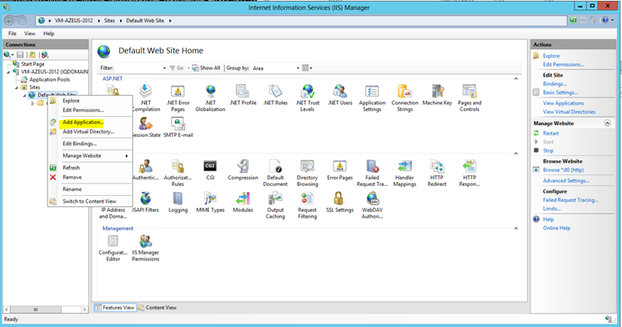
- Create a new application by right clicking on the Default Website and select 'Add Application'
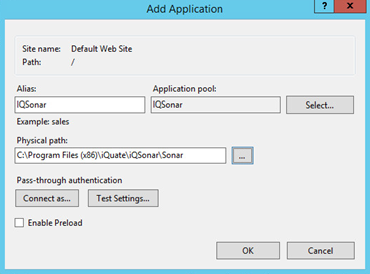
- Alias = iQSonar
- Application Pool = iQSonar
- Physical Path = C:\Program Files (x86)\iQuate\iQSonar\Sonar
- Click on OK to complete the application additon.
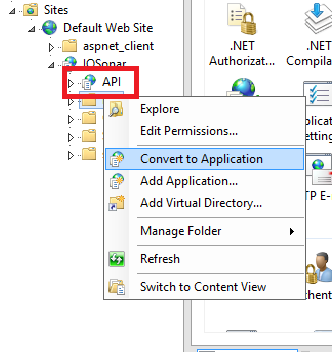
- Exapand the IQSonar folder then right Click on the API subfolder and select "Convert to Application" - the application pool should be iQSonar - click on OK.
Step 3 : Edit Web.config to add the database location and credentials and the handler mappings
- Edit C:\Program Files (x86)\iQuate\iQSonar\Sonar\web.config
- Modify connectionString with details in clear text:
{code:xml}
<connectionStrings>
<add name="databaseConnection" connectionString="factory=System.Data.SqlClient;server=SERVER\INSTANCE;database=CMS_DB;uid=USER;pwd=PASSWORD;" />
</connectionStrings>
{code}
Add the following lines near the bottom of the file (between </iquate.dal> and </configuration>)
</iquate.dal>
    <system.webServer>
        <handlers>
            <add name="SHT" path="*.sht" verb="*" modules="IsapiModule" scriptProcessor="C:\Windows\Microsoft.NET\Framework\v2.0.50727\aspnet_isapi.dll" resourceType="Unspecified" preCondition="classicMode,runtimeVersionv2.0,bitness32" />
            <add name="RPT" path="*.rpt" verb="*" modules="IsapiModule" scriptProcessor="C:\Windows\Microsoft.NET\Framework\v2.0.50727\aspnet_isapi.dll" resourceType="Unspecified" preCondition="classicMode,runtimeVersionv2.0,bitness32" />
            <add name="XML" path="*.xml" verb="*" modules="IsapiModule" scriptProcessor="C:\Windows\Microsoft.NET\Framework\v2.0.50727\aspnet_isapi.dll" resourceType="Unspecified" preCondition="classicMode,runtimeVersionv2.0,bitness32" />
            <add name="PNG" path="*.png" verb="*" modules="IsapiModule" scriptProcessor="C:\Windows\Microsoft.NET\Framework\v2.0.50727\aspnet_isapi.dll" resourceType="Unspecified" preCondition="classicMode,runtimeVersionv2.0,bitness32" />
            <add name="JS" path="*.js" verb="*" modules="IsapiModule" scriptProcessor="C:\Windows\Microsoft.NET\Framework\v2.0.50727\aspnet_isapi.dll" resourceType="Unspecified" preCondition="classicMode,runtimeVersionv2.0,bitness32" />
            <add name="CSS" path="*.css" verb="*" modules="IsapiModule" scriptProcessor="C:\Windows\Microsoft.NET\Framework\v2.0.50727\aspnet_isapi.dll" resourceType="Unspecified" preCondition="classicMode,runtimeVersionv2.0,bitness32" />
        </handlers>
    </system.webServer>
</configuration>
Sample Web.config file (Click to download)
Re-encrypt Web.config:
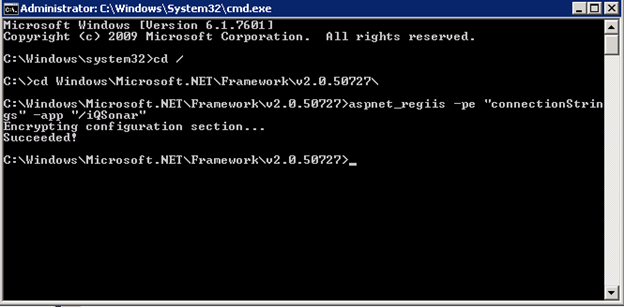
- Open Command Prompt as Administrator
- cd to .NET Framework directory - %windir%\Microsoft.NET\Framework\v2.0.50727\
- Run aspnet_regiis -pe "connectionStrings" -app "/iQSonar"
Step 4 - Change permissions
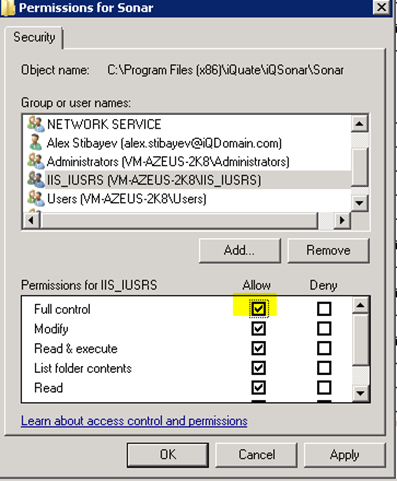
Change permissions C:\Program Files (x86)\iQuate\iQSonar\Sonar to allow cache files to be created correctly.
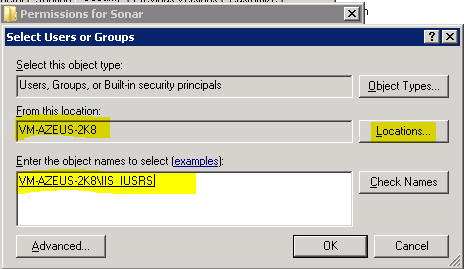
Add the IIS_IUSRS local group to the Sonar Directory.
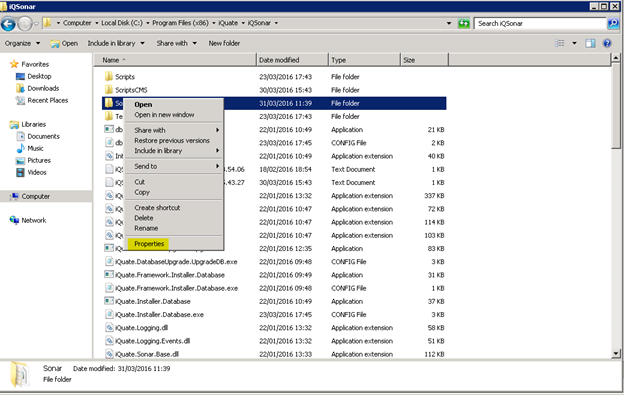
- Right Click on the folder and click properties
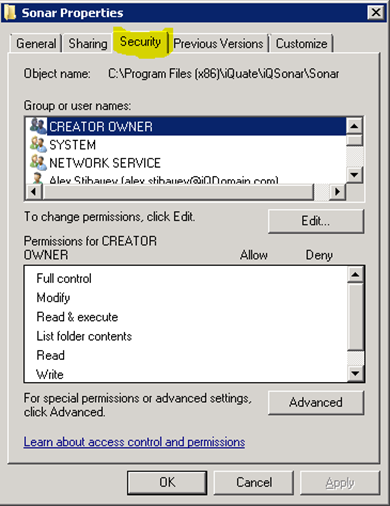
- Check security tab
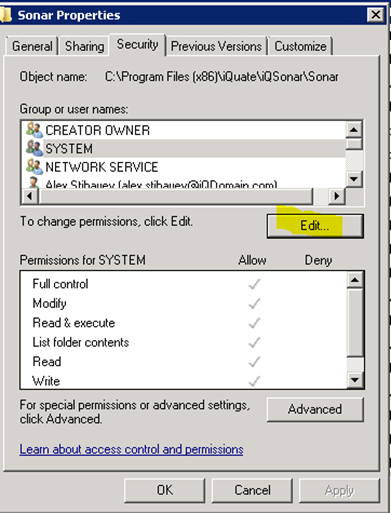
- Press Edit
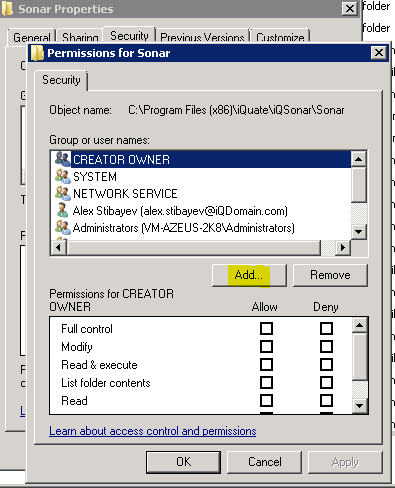
- Press Add
- Make sure the Location has the hostname of the VM and type the group
- Press ok and Make sure you give the group Full control
Related articles
- Page:
V4 installation error message: missing table - t_Artifact missing error
- Page:
Insert IP Ranges into iQSonar Database directly.
- Page:
V3 Applications that are not mapped to a device
- Page:
V3 How to Create a Derived Software Rule using process information.
- Page:
